
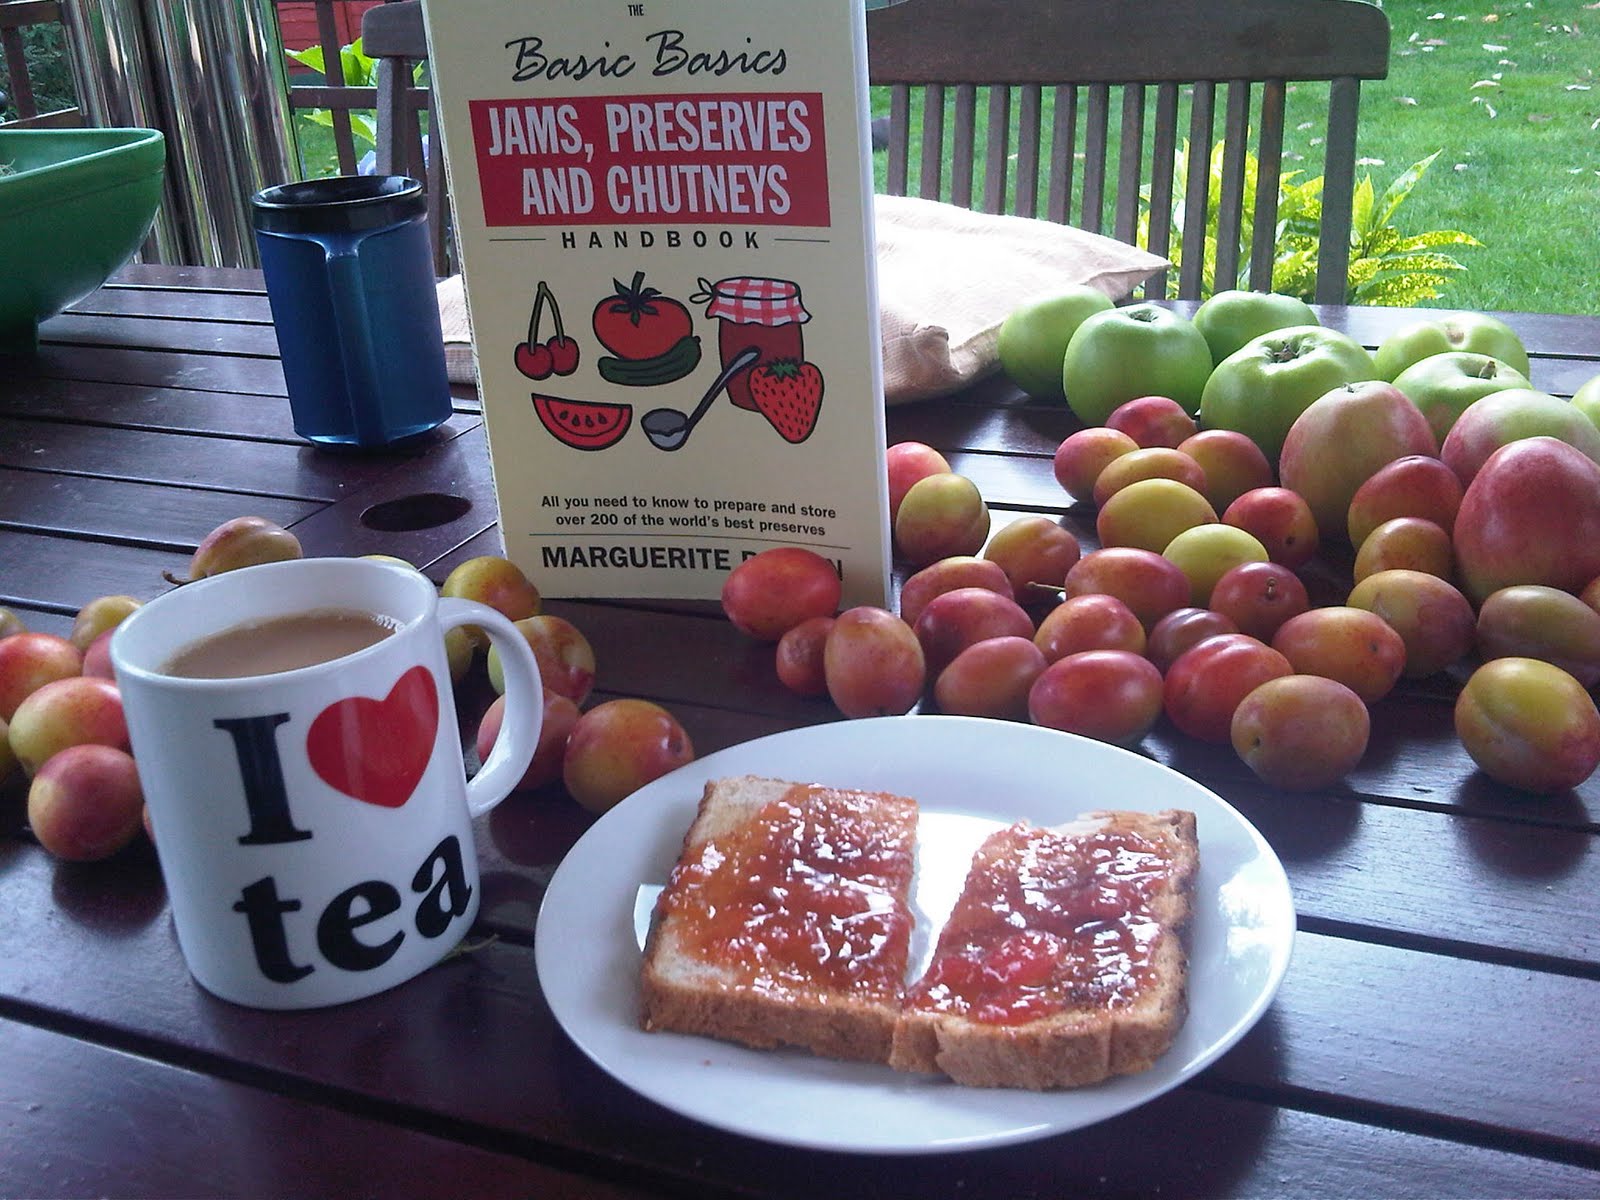
The weather wasso lovely this afternoon that I engaged in a spot of ‘Englishness’ and indulged in one of my old granny hobbies – jam making. Last year when I graduated from Uni I found myself without a job and as a consequence very very broke. It just so happened that I visited my uncle and he had a glut of apples on his fruit trees. So I diligently collected them so they wouldn’t go to waste and had a problem – what to do with them all?! I had a light bulb moment that I could make all the apples into jam and give them to people for Christmas presents as it is a cheap alternative to bought presents and adds a little personal touch to Christmas festivities. So with the glut of fruit this year and a new found passion for jam making I got out the kit and made some jam!
|
| The fruits of my labour – no pun intended |
So as you can see above we have quite a lot of plums hanging around. Our ever so thoughtful neighbours have VASTLY overgrown fruit trees full to the brim with Victoria plums. The upside of the overgrown trees is that the branches laden with fruit tend to overhang into our garden where only we can reach them. Not one to let good fruit go to waste (and in a bid to stop the wasps swarming on rotten fruit) my Dad and I diligently picked the ones on our property! So whilst the overgrown trees block out our daylight – at least we get something in return, thanks thoughtful neighbours :-p
So I will now show you how I made “Betty’s Homemade Plum Jam”

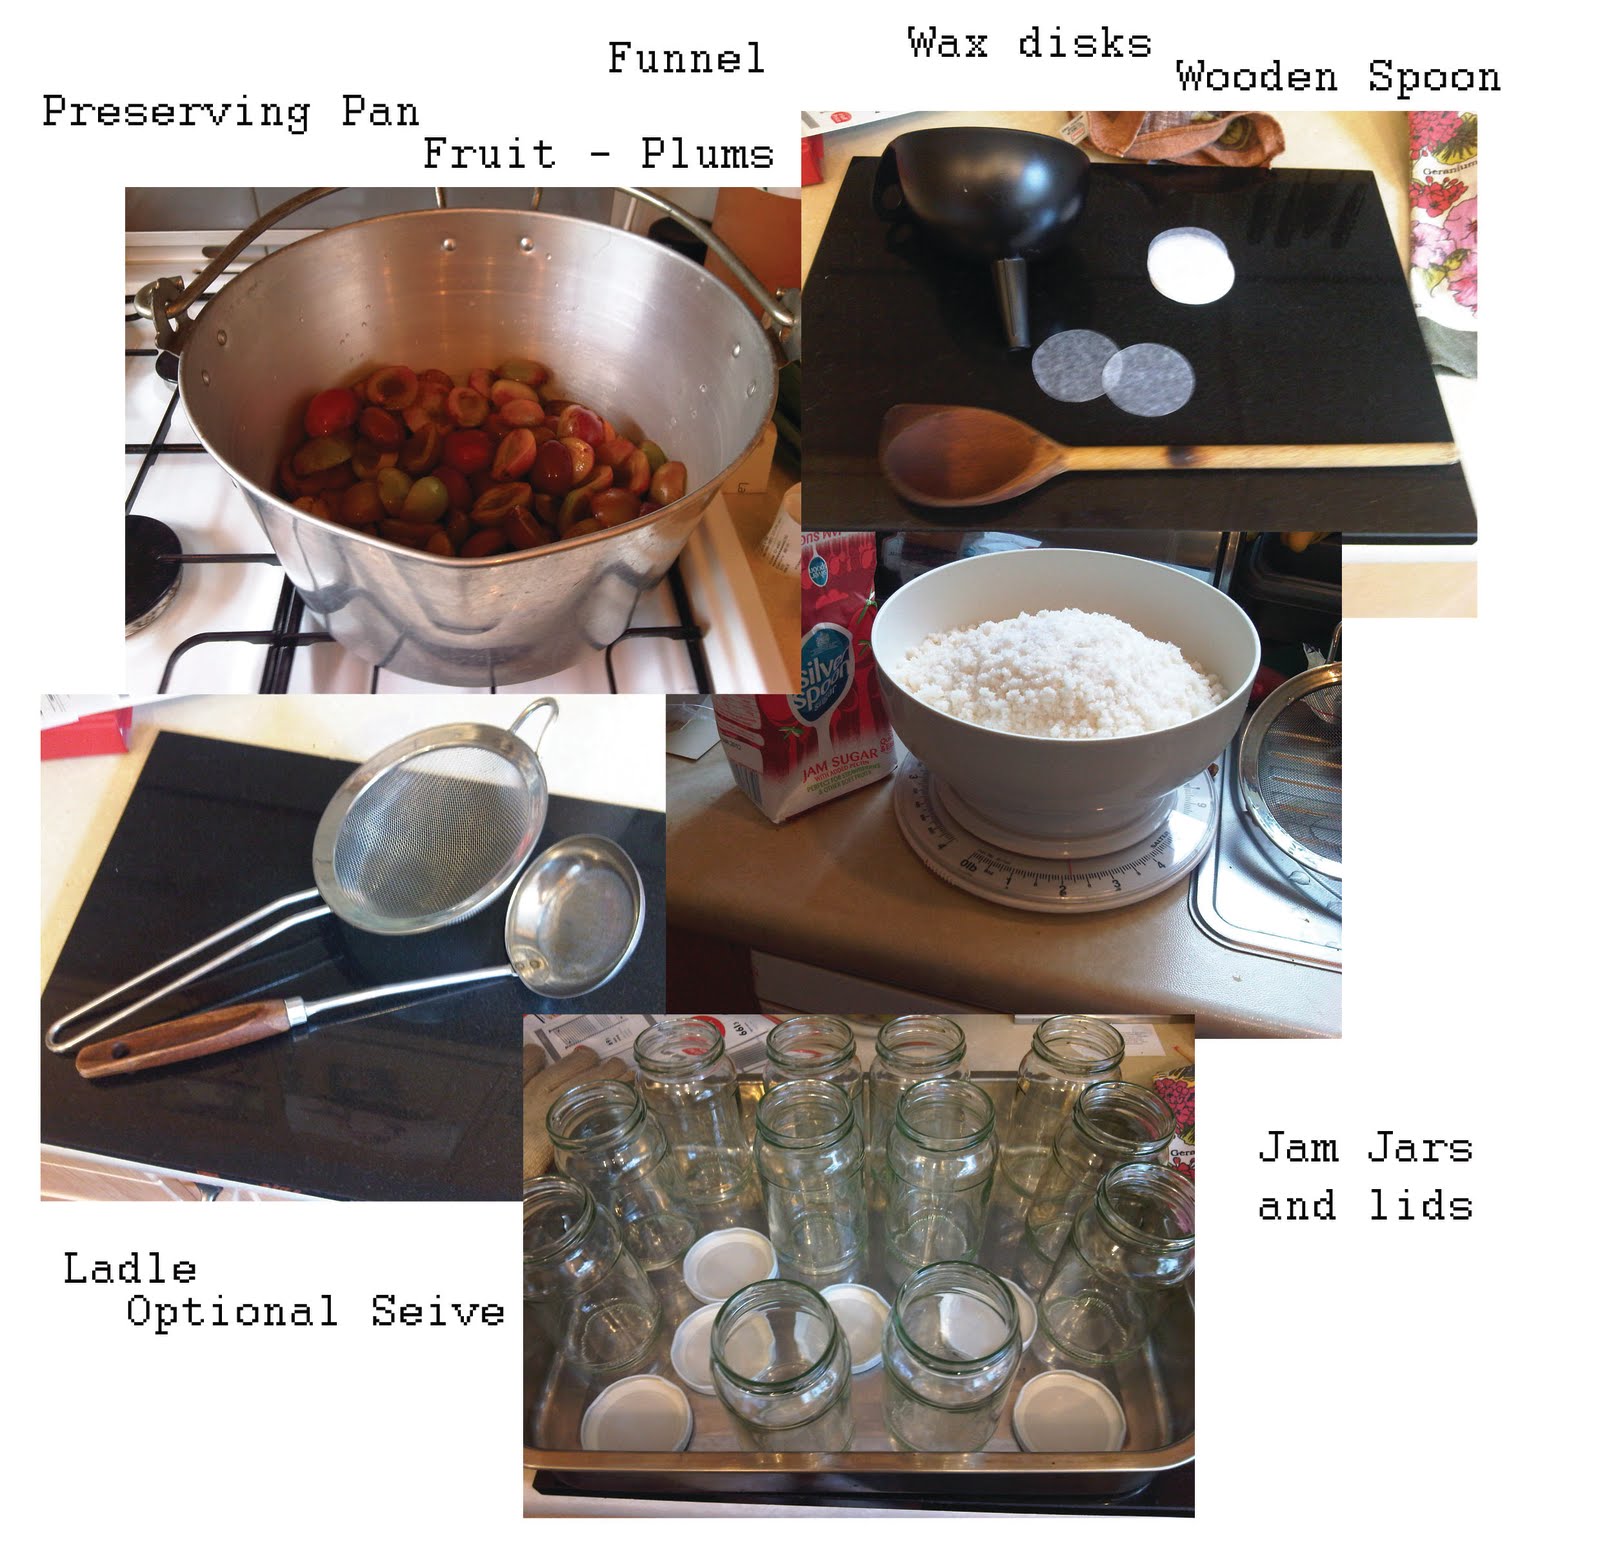
I recently purchased a proper jam book (had just chucked things in and hoped for he best in the past) called “The Basic Basics Jams, Preserves and Chutneys Handbook”, by Marguerite Patten. This is now my new favourite book! So according to the recipe you need the following:
1lb Plums
1lb Sugar
Up to 4 tablespoons of water
Preserving pans can be expensive from kitchen shops, there was one I looked at in Lakeland that was nearly £50! So when I saw the above pan on the great vintage homewear website “Home Sweet Homestyle” I just HAD to buy it at a mere £18! I had not anticipated how huge it is lol, the Lakeland ones are minute compared with this one, so mine was deff a bargain AND has some history to it :).
Anyway back to the jam, we had SO many plums that I think in the end I chucked in 3lbs. To begin you bring to the boil the water and fruit like so:


Once it is boiling along nicely and the fruit has broken down slightly, the sugar is then added. I only had 2 and a bit lbs of sugar, to my 3lbs of fruit, but as a family we tend to like things a little less sweet than shop bought as everything seems to have sooooo much sugar in! But just in case there was not enough pectin I added in the juice and rind of one lemon at this point too.

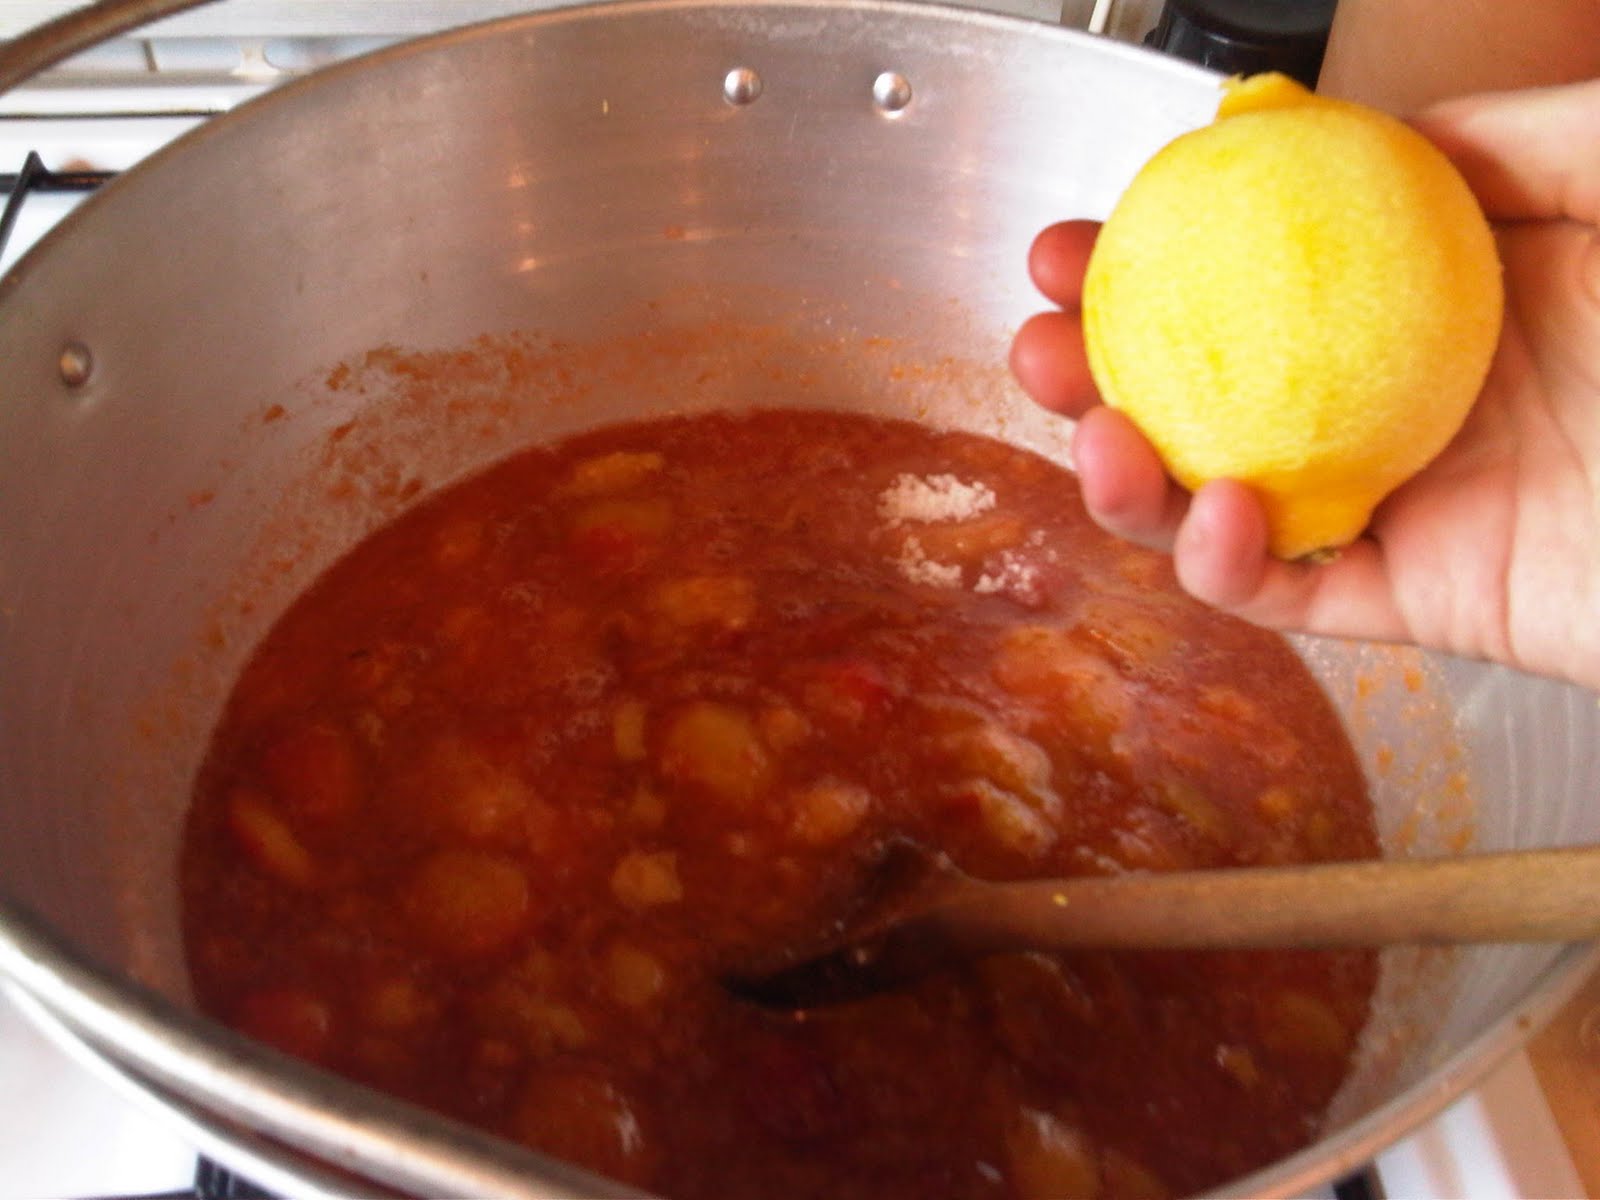
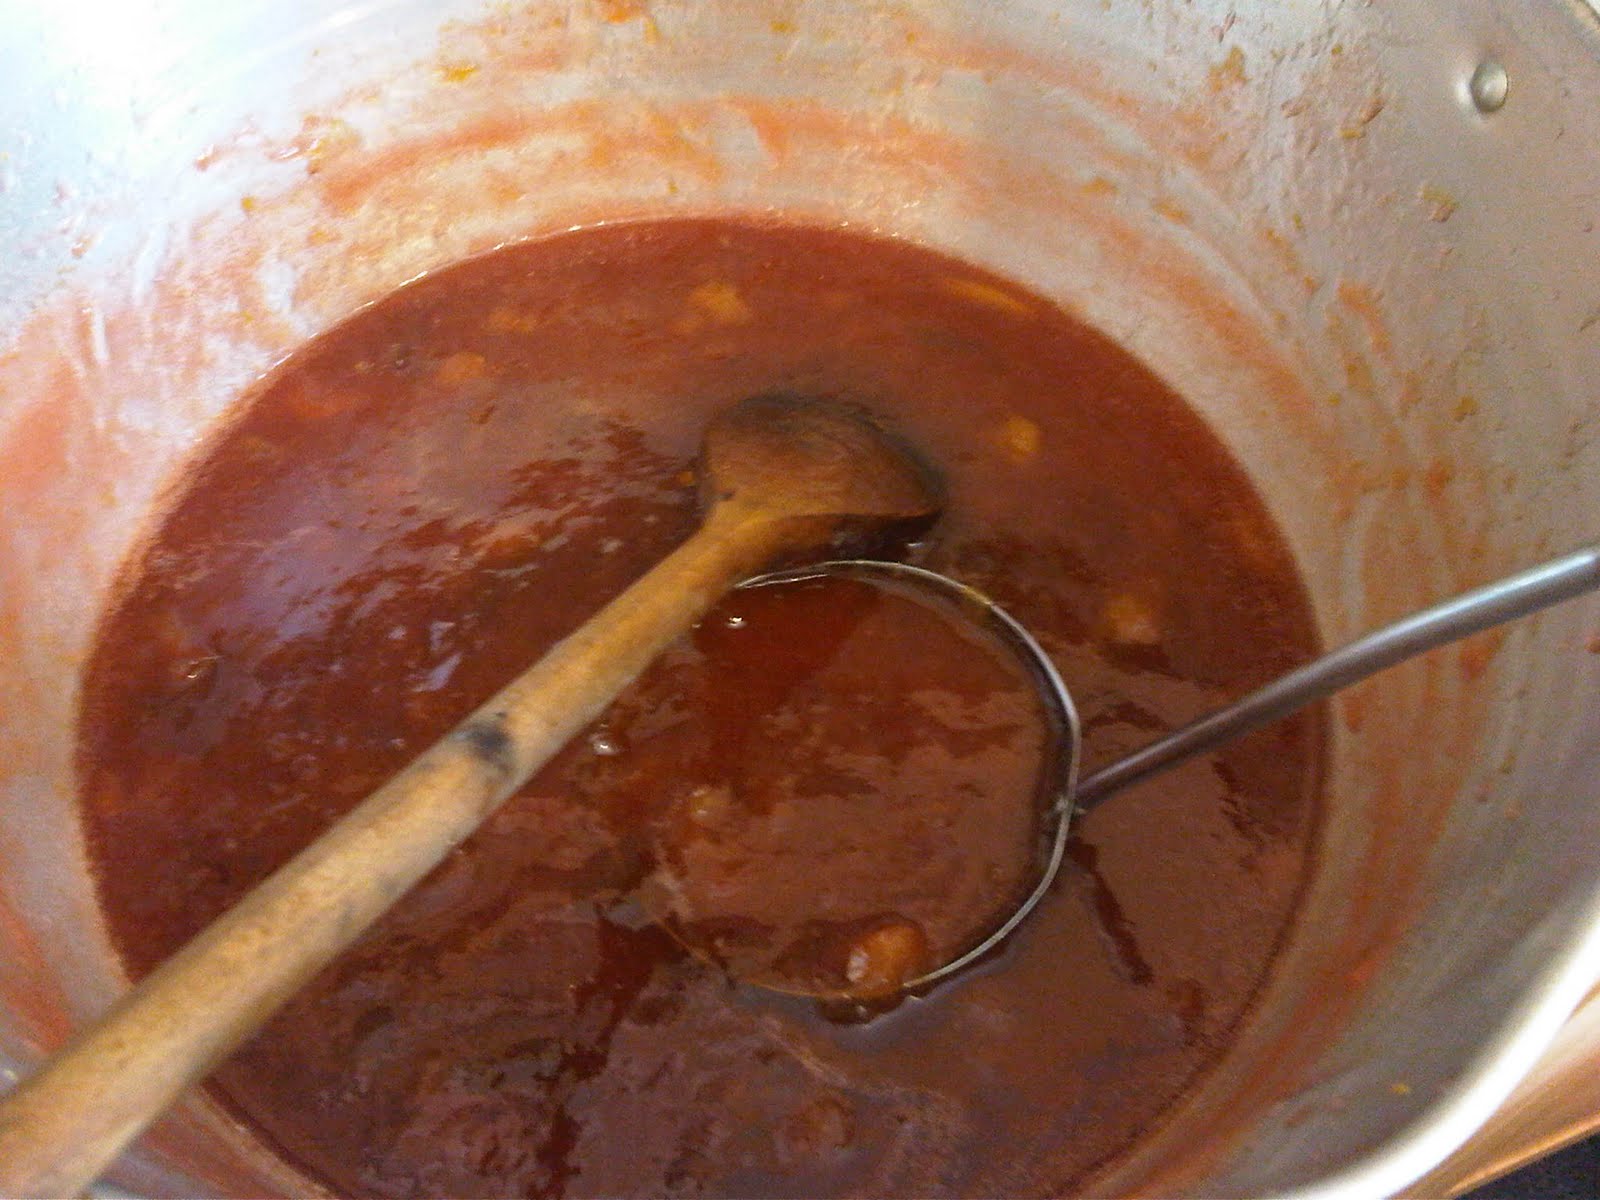
Then you need to boil, boil, boil and boil some more! This took a lot longer than our dear Marguerite Patten said in the book as I had tripple the amount of fruit/sugar, but didn’t take three times as long. It took a good hour and a half or more to reach the setting point! This is the jam bubbling away:

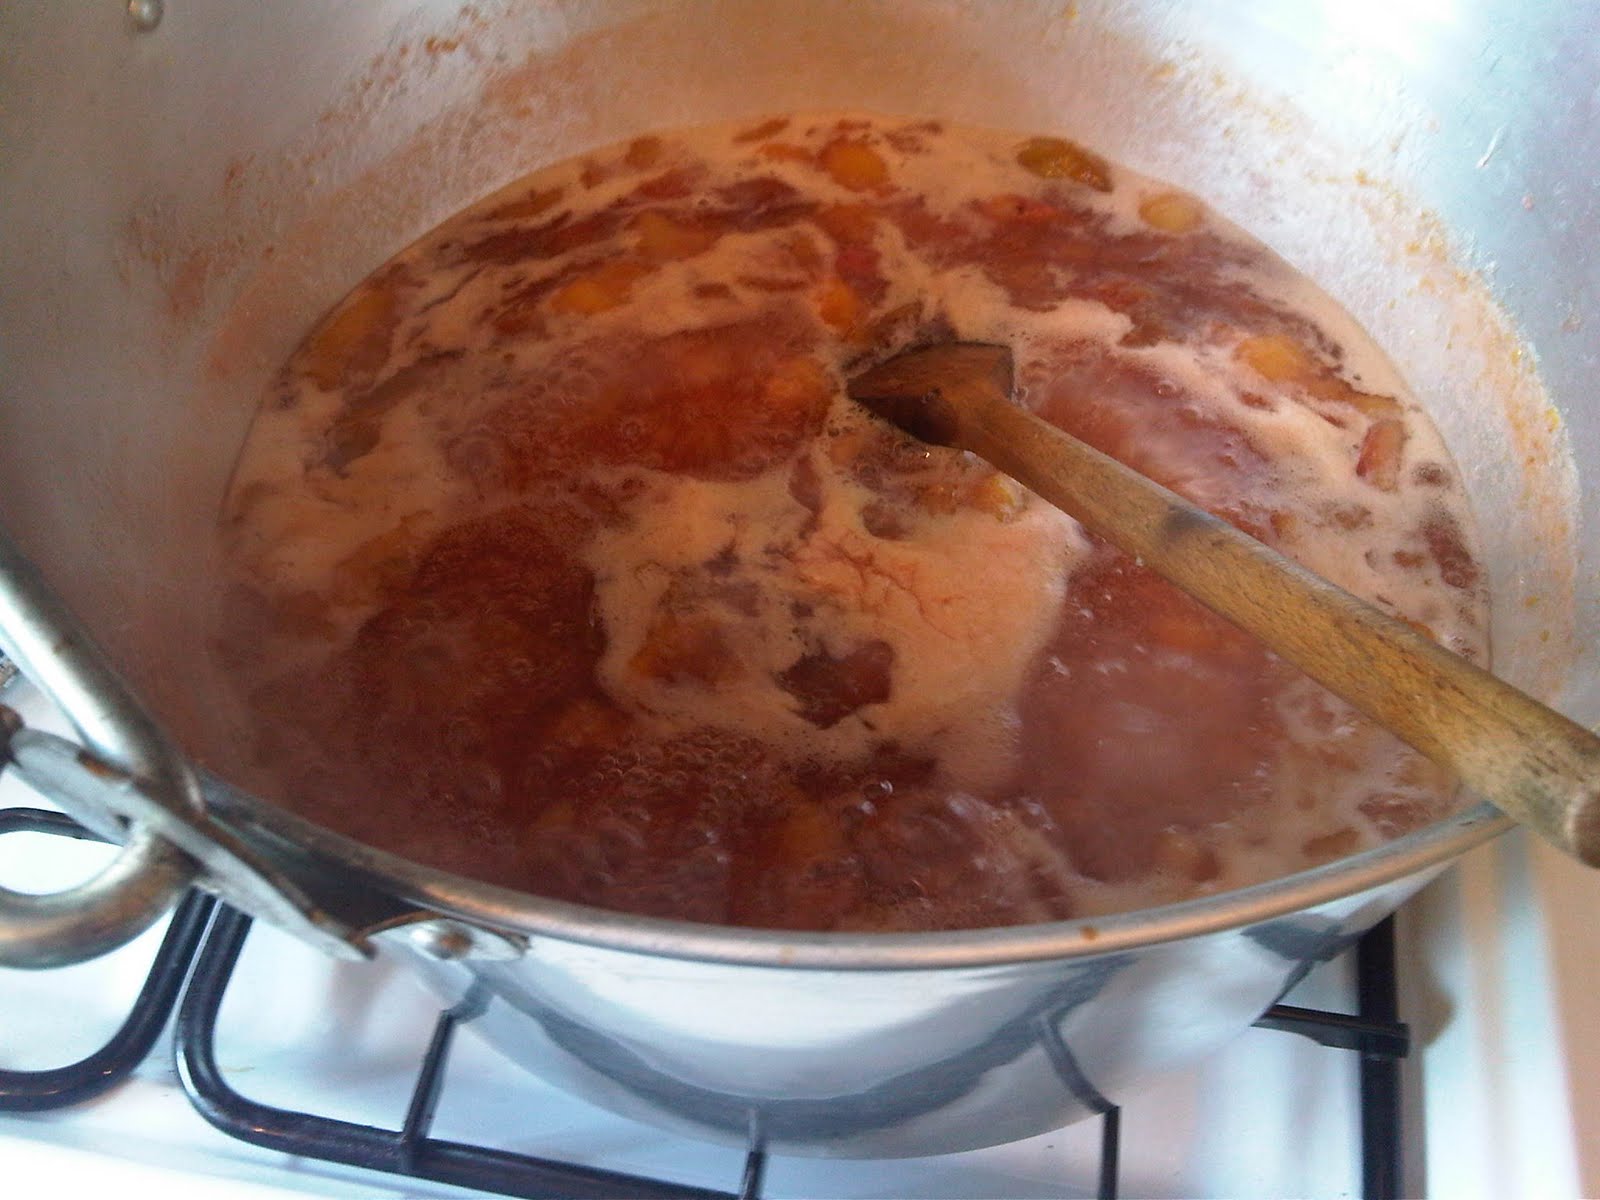
and this is what the jam looked like once the setting point had been reached:
|
| You can see how much the jam has “reduced” by the lines around the pan 🙂 |
As you can see the second picture looks a lot shineyer and just generally more sticky and jam like. The way to test the setting point has been reached is to put a little blob of the jam on a cold plate, let it cool a little and then push your finger into the liquid. If the jam wrinkles and has formed a sort of skin to it, it is ready. If not boil it some more!!! But once you have made a few batches of jam it is easy to tell by look and consistency whether it is ready to be jarred!
The jars have to be steralised beforehand to make sure that no bacteria is trapped in the jar, so the jam won’t go mouldy. I washed the jam jars and lids with fairy liquid, then dried them with a clean tea towel. I then placed them in a baking tray and “cooked” them in the oven at a high temperature for about 10 mins or so. When I took them out I made sure that nothing touched the inside of the jars and lids whilst jarring up the jam. I did this by placing a funnel in the jars and using a ladle to spoon in the mixture like so:

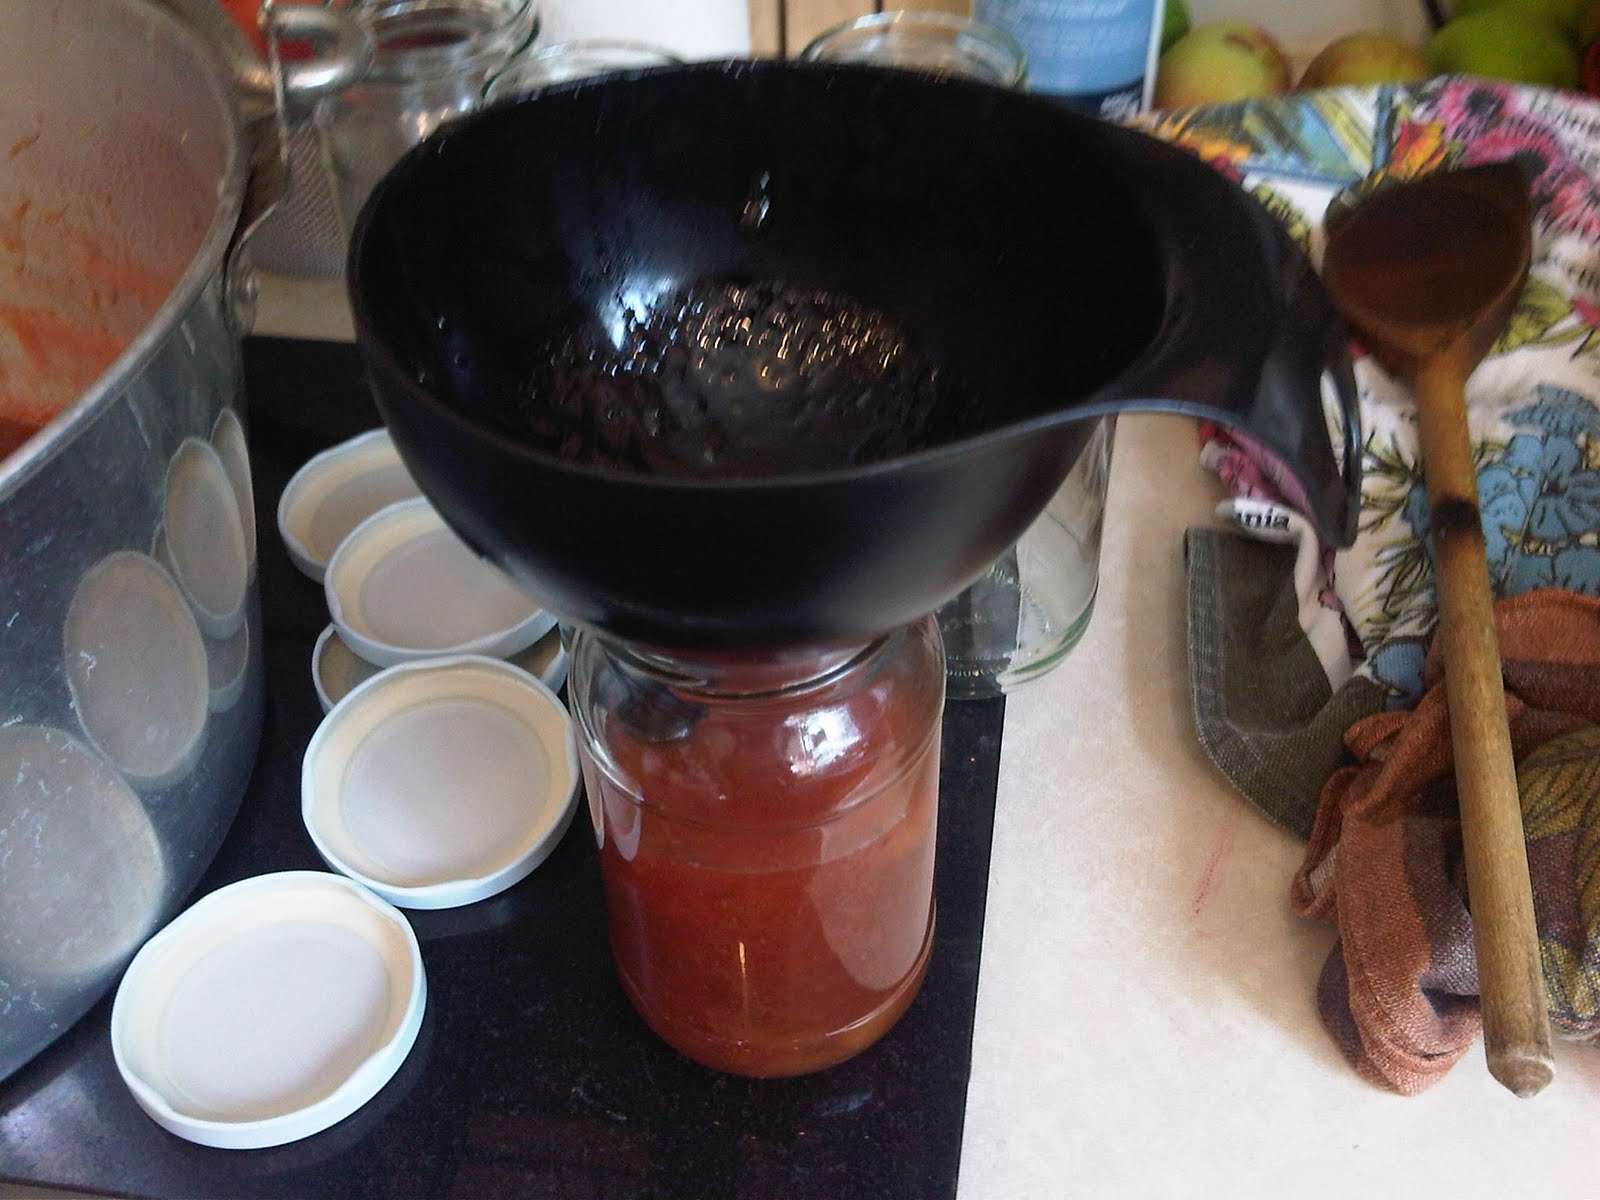
*You could also at this point use a sieve to get out all the lumps of fruit but I decided not to as I like my jam with fruity bits :)*
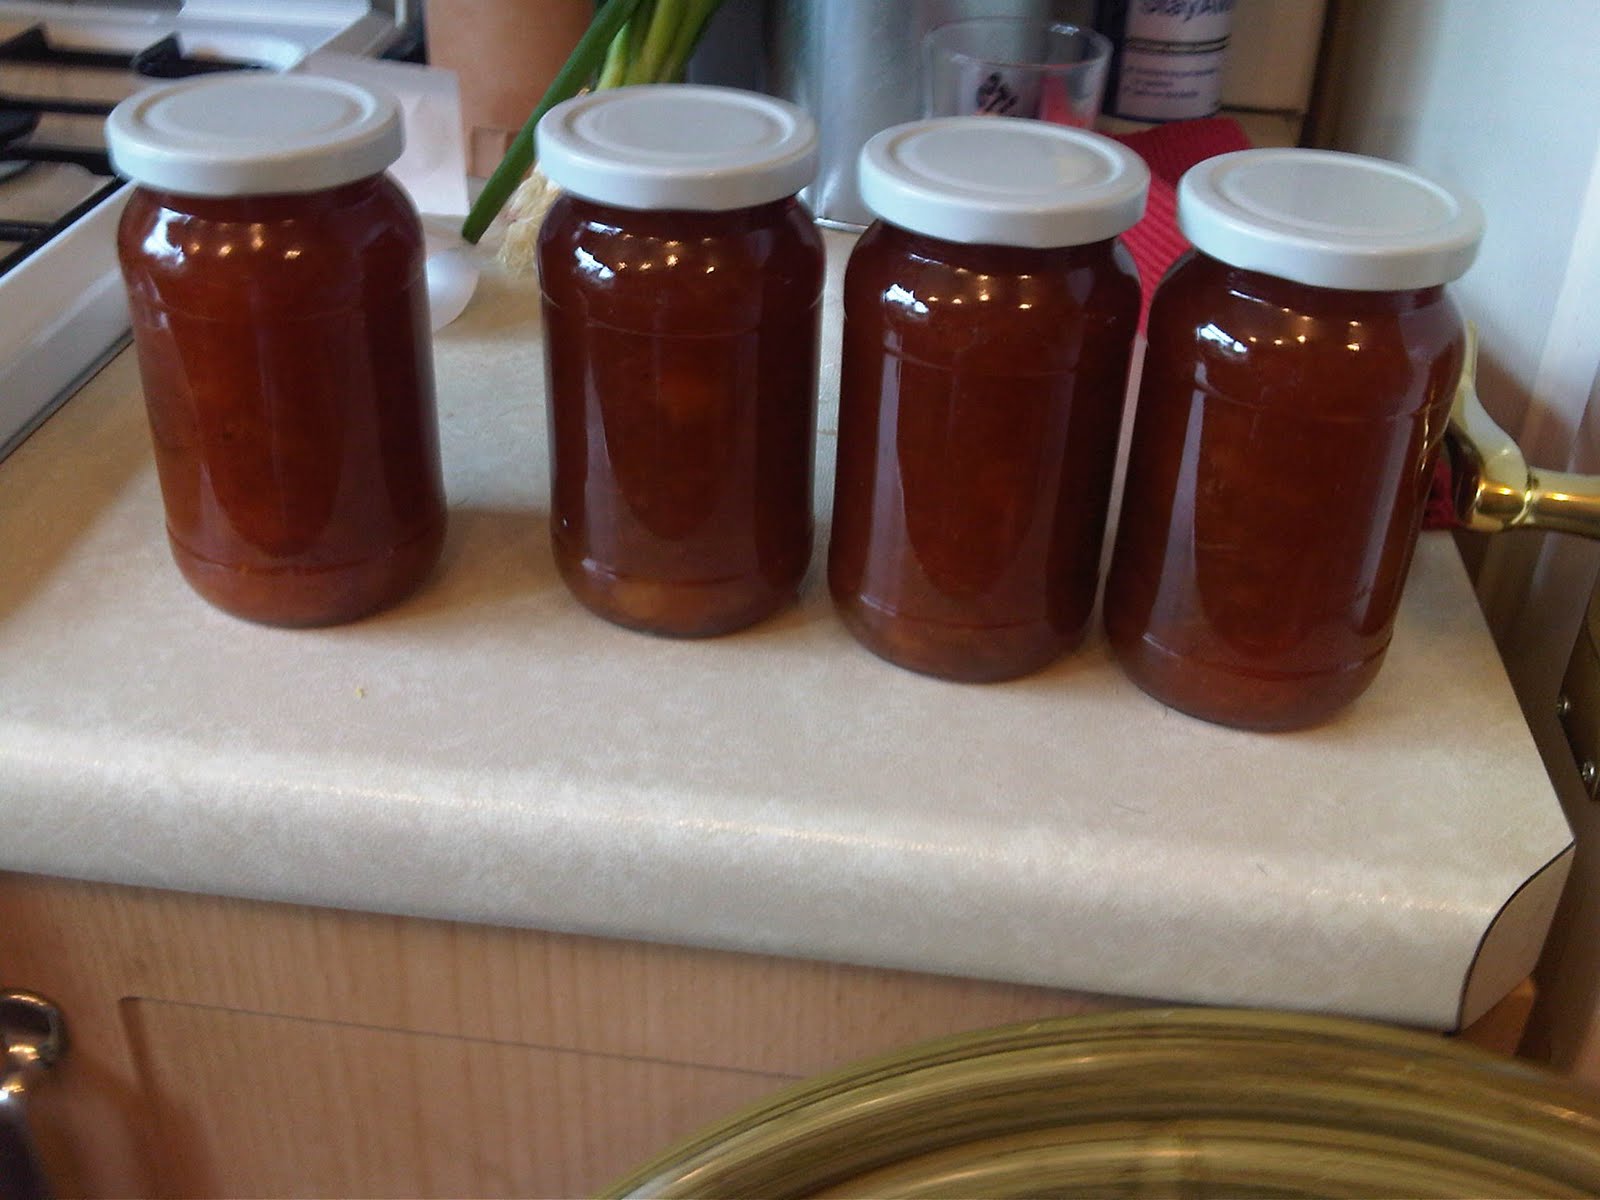
Once jarred I popped a little wax disk on top of the jam to exclude the air, then tightened the screw top onto the jars. This is how many jars that 3lbs of fruit made:

There was also a little bit left over, roughly half a tea cup full, that was immediately put to good use!! I made a nice cup of tea and had a slice of toast with butter and jam! (refer to the first picture!)
So that is what I did this afternoon. I do so like doing “English” things and keeping our traditions alive – apparently my Grandma had a book about jam by Marguerite Patten, so I chose the right jam book to buy! There are SO many good recipes and I now know the difference between a jam, preserve and jelly!! I hope you enjoyed this post and may be inspired to take up jam making 😉
Lots of love
Betty xxxx
Leave a reply